
Centrifugal Pump Overhaul — Isolation, Strip, Measure, Rebuild
How spin becomes pressure, why two isolations must die before a spanner turns, and the strip-measure-rebuild loop that restores performance.
Key Principles at a Glance 5 points
- A pump adds energy to fluid — one failed pump can idle propulsion, power, boiler or cargo plant, so upkeep follows maker schedules plus class rules reviewed against real conditions.
- Isolate twice: electrically (stop, breaker off, permit, fuses, off auto-start, warning board) and hydraulically (suction and discharge shut, zero pressure proved at the purge cock).
- Never lay stripped parts on the floor — clean surface only; draw bearings off with a puller on the inner ring, never strike them with a hammer.
- Measure, do not eyeball: impeller-to-wear-ring clearance top and bottom, sleeve wear, seal faces and bearing plus casing-bottom bush against maker limits.
- Reassembly ends with proof: new O-rings, flooded casing, air purged, seal faces dry, shaft barred free, then run and log parameters against baseline.
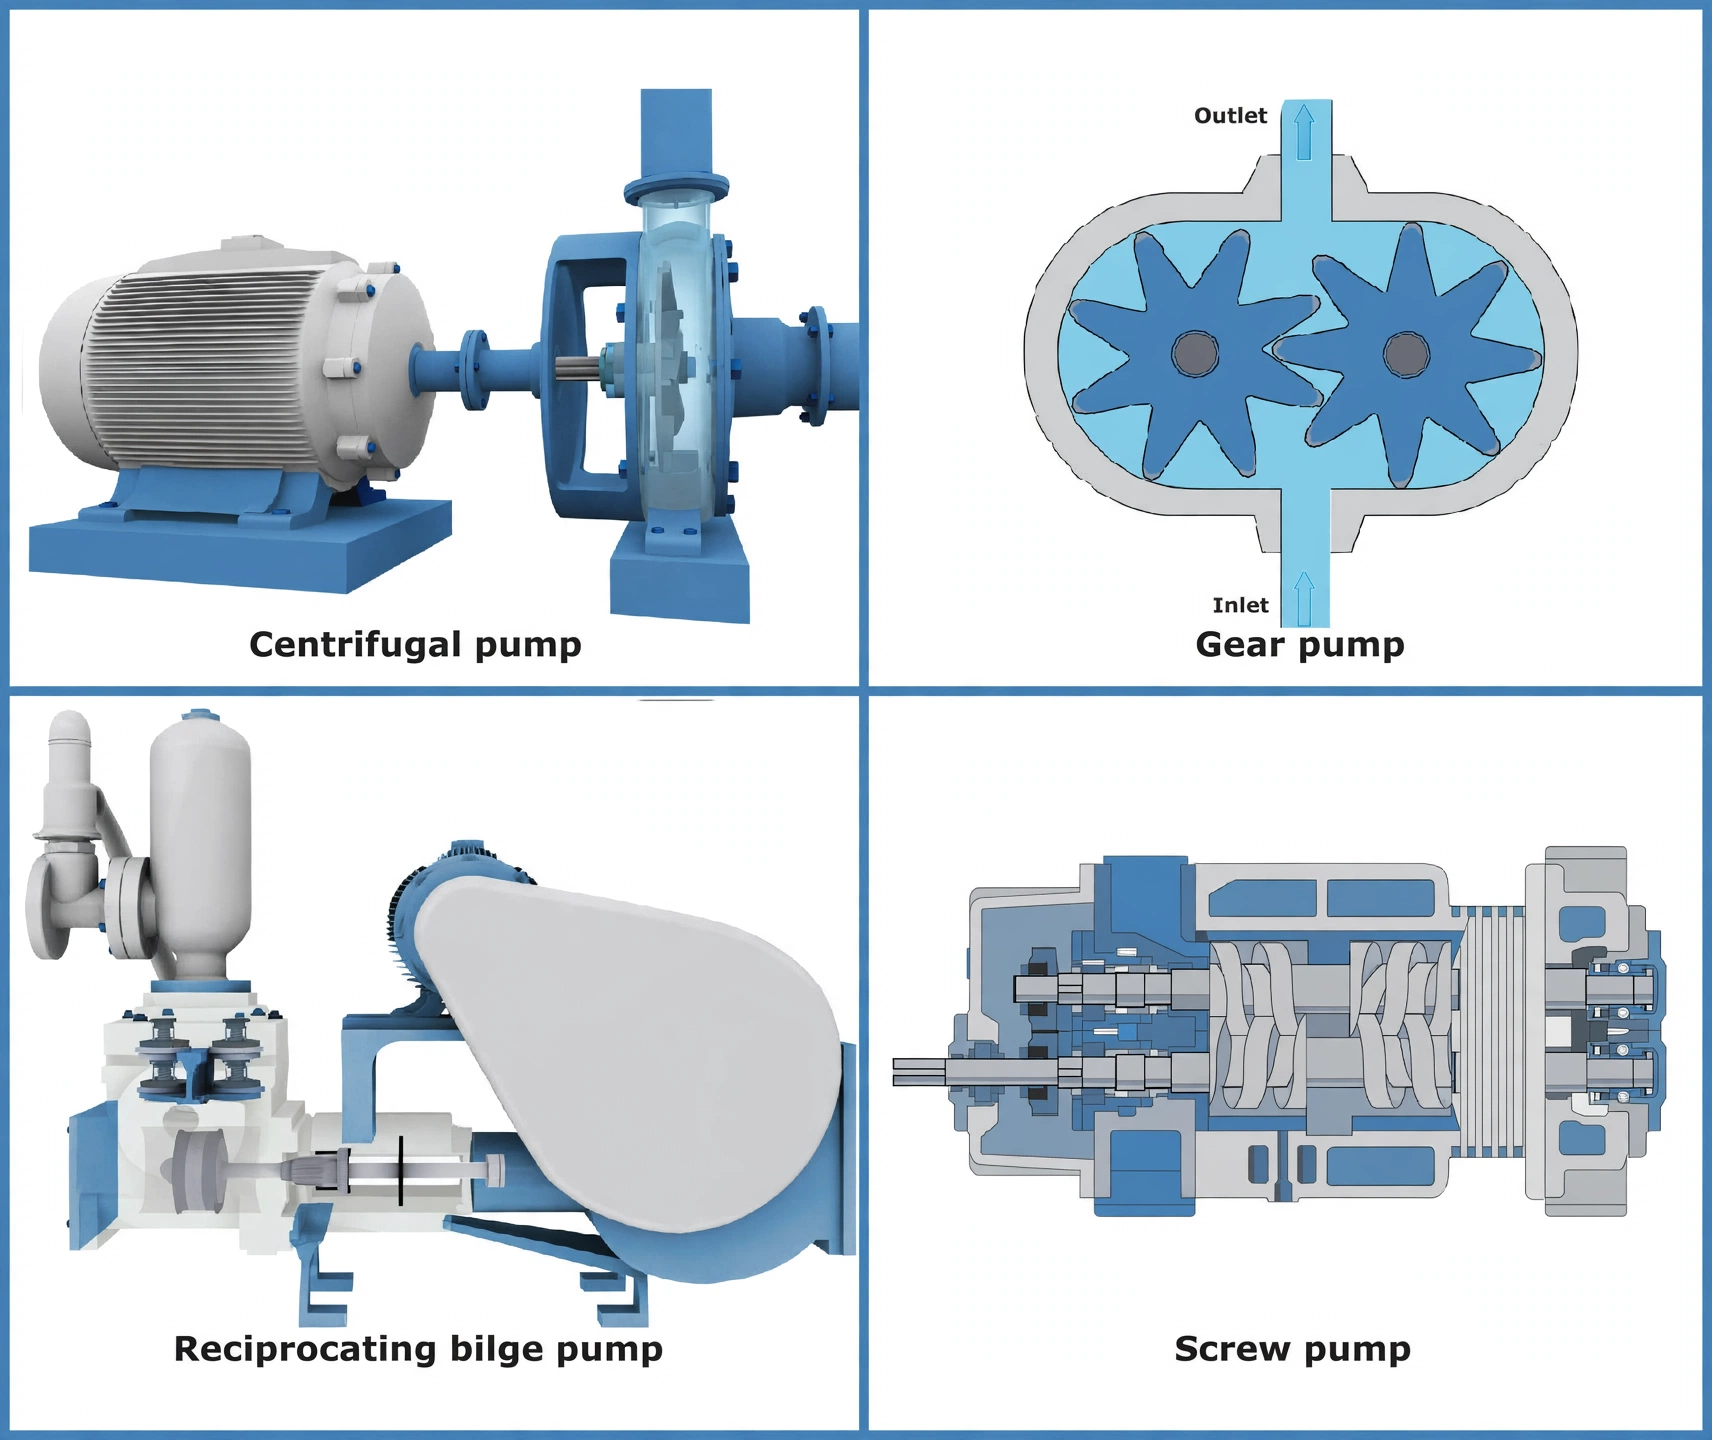
1. The Four Families & Why Pumps Matter
Idea in one line: a pump adds energy to liquid — and on board, every major plant stands on its pumps.
Main-engine propulsion, auxiliary power, boilers, cargo systems — each depends on its pumps. One failed unit can idle the whole plant, which is why upkeep runs on planned maintenance built from maker recommendations and class requirements, reviewed against actual operating conditions. A steady watch on running parameters catches faults early, long before breakdown.
2. Isolate Twice — Electrical and Hydraulic
Idea in one line: two energy sources can hurt you — the motor that can restart itself, and the liquid still under pressure.
Both must be dead before a spanner turns. Automation is the silent one: a pump left on auto-start or standby priority can start mid-overhaul, so it comes off both first.
Stop and de-automate: stop the pump, take it off auto-start and off standby priority — automation must have no path back in.
Electrical dead: control-room breaker off, electrical isolation permit taken, local panel breaker off, fuses removed where fitted — then hang the warning board.
Hydraulic dead: shut suction and high-pressure discharge valves, confirm each is holding — then prove zero pressure at the purge cock, because a passing valve lies silently.
Valves shut is a claim; zero at the purge cock is the proof. Crack the cock and watch — pressure still showing means a valve is passing and the job stops here.
3. Dismantle Top-Down Without Losing Anything
Idea in one line: the whole rotating assembly lifts out as one cartridge — then it comes apart in a fixed order so nothing is forced.
Clean surface for parts — never the floor or a dirty bench. Re-confirm the motor cannot start and both valves are shut and holding, then work from the coupling inward.
Free the coupling: unbolt the distance piece between pump and motor couplings (both sides, discs kept together) — the pump half is now independent.
Open the casing: disconnect mechanical-seal cooling lines; unbolt and lift the casing top cover — keep every bolt with its flange.
Lift the cartridge: raise the rotating assembly out — shaft, bearing housing, bearing, mechanical seal, impeller and sleeved shaft together, straight up without dragging.
Strip the shaft: slacken the impeller lock nut, pull the impeller, pocket the shaft key immediately — small parts vanish first; then distance ring off, seal rotating unit off its screw.
Free the bearing end: bearing-housing bolts out, casing cover and sleeve off, circlip out, housing with bearing off — housings and covers land on the clean surface, never stacked on sealing faces.
Draw the bearing off with a puller engaging the inner ring, steady force until the bore clears the full seat length. A hammer blow brinells the races — the damage is invisible and the failure arrives weeks later.
4. Inspect and Measure — Renew on Numbers
Idea in one line: every wearing gap is a leak path in disguise — the gauge decides, not the eye.
Clean impeller, bearing, sleeve, casing and shaft first, then judge each part for damage, deformation and wear against the maker limits:
- Impeller-to-wear-ring clearance (top and bottom rings) — excess gap recirculates discharge back to suction and efficiency bleeds away; renew past the limit. This is the pump's most common silent killer.
- Shaft sleeve — any measurable wear-down means renewal; the sleeve exists to be sacrificed so the shaft survives.
- Mechanical seal faces (rotary and stationary) — scoring or chipping condemns them; faces must be flat and unmarked.
- Bearing and casing-bottom bush — roughness, play or visible damage means renewal; a worn bottom bush lets the shaft orbit and eats the seal next.
5. Rebuild in Reverse, Then Prove It
Idea in one line: assembly mirrors dismantling with new seals throughout — and the pump earns its coupling back only by test.
Renew top and bottom O-rings and joints as routine; old elastomers owe you nothing. Build the cartridge first, land it in the volute, then prove hydraulics before connecting drive:
Build the cartridge: bearing into housing, circlip, grease, housing cover on — then seal stationary unit into the casing cover, because it seats cleanest before the shaft is in the way.
Dress the shaft: sleeve on, cover over the shaft, seal rotary unit locked to the sleeve; distance ring, key, impeller, shaft nut with lock plate — each in order, none forced.
Land it: lower the assembly into the volute, torque covers down, reconnect seal cooling — cooling first, liquid second.
Prove before coupling: flood the casing, purge every trace of air, confirm the seal faces stay dry — air left inside means the impeller churns froth, not water; then bar the shaft, which must turn freely.
Couple and run: fit the distance piece with its discs, run the pump, and log suction/discharge pressure, current and vibration against baseline — the log is what catches the next failure early.